Trimming your puppy’s nails is an essential part of their grooming routine. However, many puppies find this process uncomfortable or frightening. To ensure a positive experience, it’s crucial to gradually introduce your puppy to the tools and sensations associated with nail trimming.
Curious about how to trim your pup’s nails? Here, we will provide you with a step-by-step guide to trimming your puppy’s nails while also incorporating tips to help your furry friend become comfortable with the process. By following these steps and practicing patience, you can ensure that nail trimming becomes a stress-free experience for both you and your puppy!

Preparation: Getting Your Puppy Comfortable!
To set the stage for successful nail trimming sessions, it is important to gradually introduce your puppy to the nail clippers or grinder. Here’s a 7-day plan to familiarize your puppy with the tools and build their confidence as described by the American Kennel Club (AKC). Since you are trying to create a positive experience with the clippers, remember to provide them with treats and verbal praise every step along the way, take a break if they show any signs of distress!
- Day 1: Let your puppy explore the nail clipper by letting them sniff the tool.
- Day 2: After they have explored the clippers on their own, you can now lightly touch the clipper on each paw and treat and reward each time.
- Day 3: Touching the nail clipper on their paws, start using the clippers without actually cutting their nails yet. Let them hear the sound of the clippers and feel the vibration that it creates!
- Day 4: Repeat the steps of day 2 and 3 while continuously providing praise and treats. Be sure to monitor your puppy’s response!
- Day 5: Start to trim the tip of just one nail. Remember to give extra praise and treats!
- Day 6: From here, you can trim the tip of another two nails, increasing the number of nails each day.
- Day 7: As you work your way up, trim the other nails until you’ve covered all the nails. Be sure to give treats and praise as you create a positive experience for your puppy for future trimming sessions!
If your puppy is not comfortable or familiar with having their feet touched, you will need to start by desensitization to this part of the procedure and that could take a week before you start on the clipper training.

The Step-by-Step Guide to Trimming Your Puppy’s Nails
Now that your puppy is familiar with the nail clippers or grinder, and has built confidence through the preparatory steps, it is time to proceed with trimming their nails. Follow these steps for a successful and stress-free nail trimming session:
1. Prepare the Necessary Tools
Gather all the essential supplies prior to your nail trimming session and keep them close within reach. You’ll need a pair of pet nail clippers or a nail grinder, which you can find at pet stores.
It is also recommended to keep styptic powder on hand to address any accidental cuts that result in bleeding. Keep your treats nearby as well to give your pup the rewards and praise needed to create a positive experience.
2. Familiarize Yourself With Paw Handling
Before starting the actual trimming, gently touch and handle your puppy’s paws regularly. This will help them become accustomed to having their paws touched and reduce anxiety during nail trims.
3. Get Your Puppy Comfortable
Find a quiet and well-lit area where you and your puppy can both relax. Introduce your puppy to the nail clippers or grinder by letting them sniff and inspect the tools. Offer treats and praise to create a positive association.
4. Determine the Appropriate Nail Length
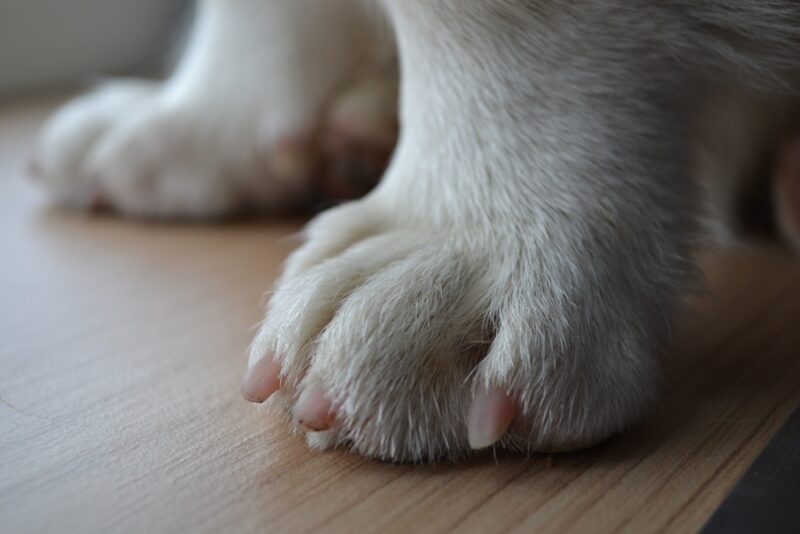
In puppies, it is important to avoid cutting the nails too short as they have a sensitive quick that supplies blood to the nail. Observe your puppy’s nails and identify the quick, which appears as a pink area inside the nail. Trim only the curved, translucent tip, avoiding the quick.
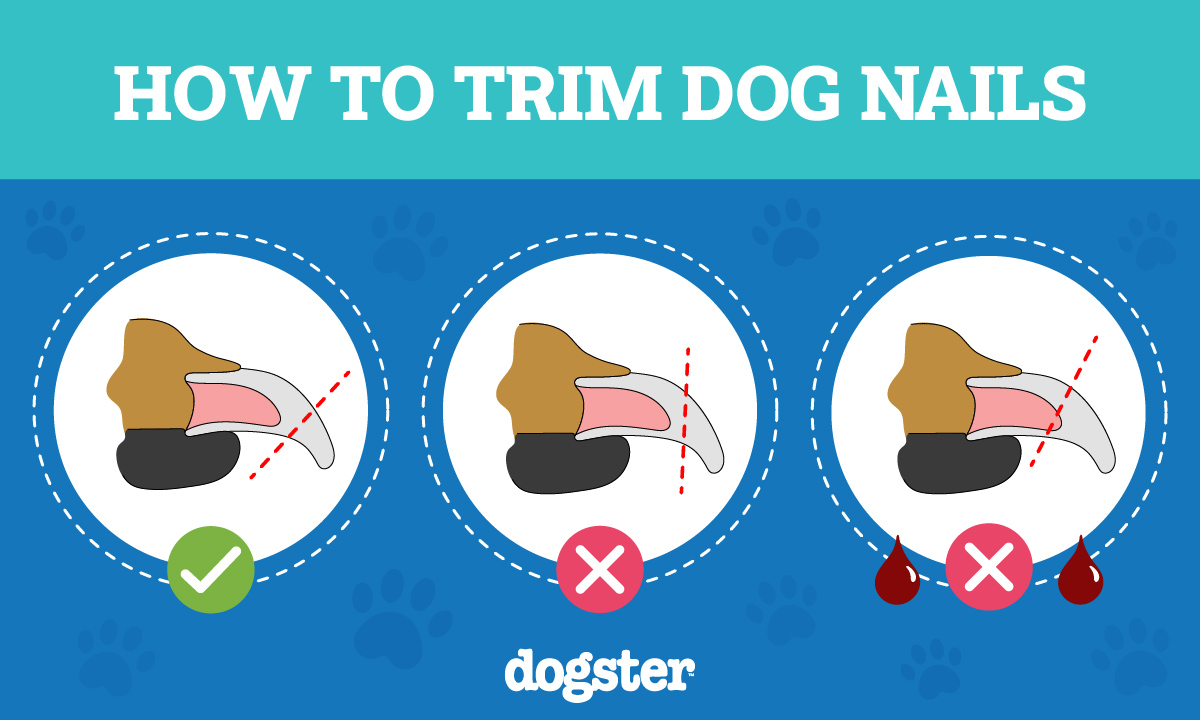
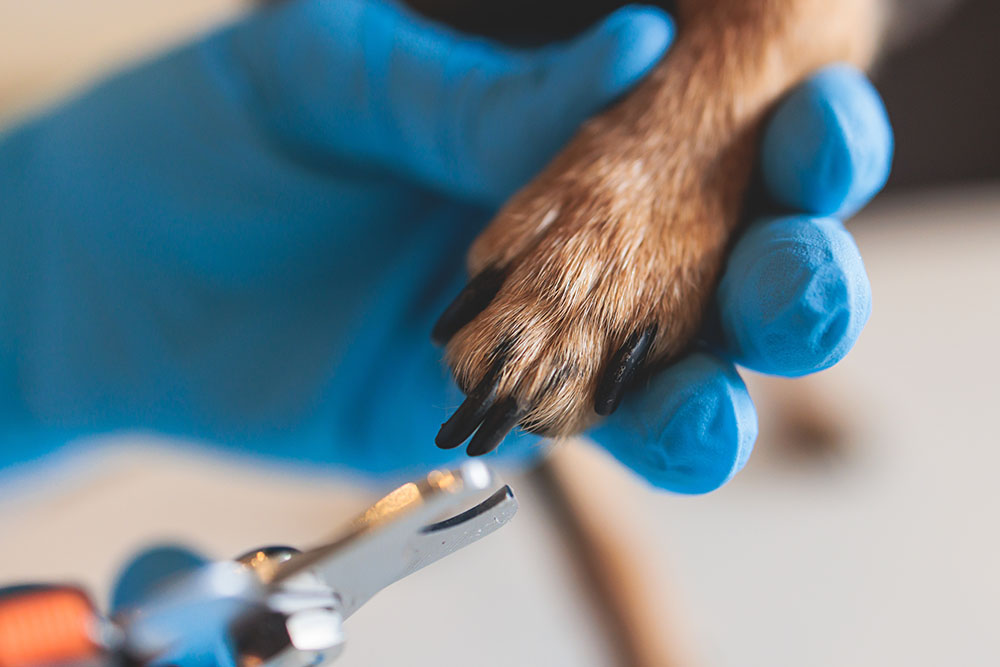
5. Start Trimming the Nails
Hold your puppy’s paw gently but firmly, making sure you have a good view of the nail. For nail clippers, position the blades perpendicular to the nail, cutting from underneath to avoid splitting or crushing the nail. For a nail grinder, gently touch the grinder to the tip of the nail while it’s running, gradually removing small amounts of length. Be cautious not to grind too much at once or generate excessive heat.
6. Be Patient and Take Breaks If Needed
Take your time and work slowly, especially if your puppy is showing signs of discomfort or stress. If they become too anxious, take breaks to allow them to relax. Reward your puppy with treats and praise throughout the process, reinforcing positive behavior.
7. Monitor and Maintain Regular Trimming!
After trimming the nails, check for any signs of bleeding. If bleeding occurs, apply styptic powder, or use a styptic pencil to stop it. If you’re uncertain about trimming your puppy’s nails or are uncomfortable doing so, consult a professional groomer or a veterinarian for guidance.
If you need to speak with a vet but can't get to one, head over to PangoVet. It's our online service where you can talk to a vet online and get the advice you need for your dog — all at an affordable price!


Promoting Puppy Safety
While nail trimming is an important part in caring for your puppy, the primary concern should always be safety. Nail trimming can be a strange and stressful situation for your pup, and the last thing you want to do is create a negative experience for them by accidentally hurting them. Here are a few things to remember to ensure that your puppy is safe during the nail trimming process:
- Identify and avoid the quick
- Use proper, high quality tools
- Take it slow and follow your puppy’s pace
- Keep styptic powder on hand
- Provide verbal praises and treats to create a positive association
- Regularly monitor and maintain your puppy’s nails
- Try a licky mat or snuffle mat as a distraction while you clip
- Seek professional help if needed
By keeping these essential safety tips in mind, you can ensure that your puppy’s nail trimming sessions are safe, comfortable, and stress-free for both you and your furry friend.
Final Thoughts
Trimming your puppy’s nails can be a simple and stress-free process when approached with patience, gradual introduction, and positive reinforcement. Remember, it’s essential to approach nail trimming with patience and care. By using positive reinforcement and taking things slowly, you can help your puppy become more comfortable with the process over time.
Be sure to always prioritize your puppy’s well-being and consult a professional if needed. With time and practice, you and your puppy will develop a routine that keeps their nails neatly trimmed and their paws happy and healthy!
Featured Image Credit: Olena Kovtun, Shutterstock


2 Responses
Seems easy enough. We are getting her ready to clip nails soon.
Well done! And the more you do it, the better you get and the more comfortable she will be. She might even look forward to it. 🙂