

Click to Skip Ahead
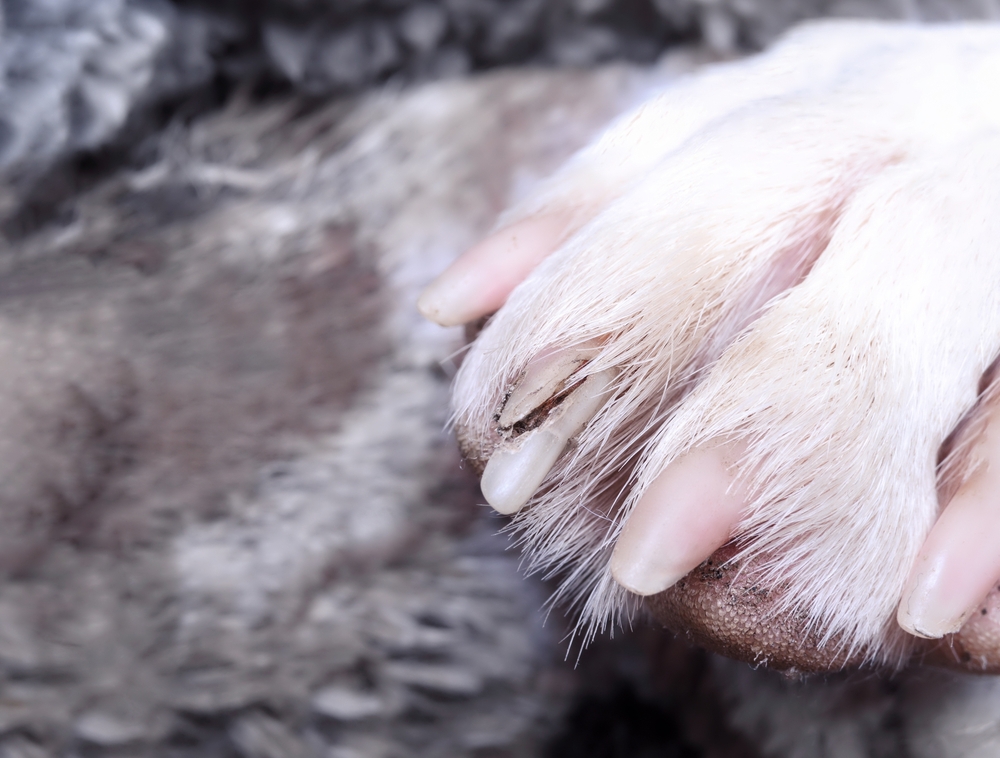
A dog’s broken nail can be sore and bleed a lot, too! Like us, dogs have sensitive tissue with nerves and blood vessels attached to the nail where it begins to grow. In dogs, this tissue is in the center of the nail, attached to bone, and is called the “quick.” If your dog has white nails, you can see the quick as an area of pink inside the nail.
This article will guide you through assessing a broken nail and deciding if you need to visit the vet. If left hanging on, a torn nail can cause your pet ongoing pain. The quick can also get infected. If this infection travels from the nail bed into the bone, a bone infection called osteomyelitis may cause your pup to lose a toe. This may seem like an exaggeration, but it happens!

Before You Start
Hopefully, you have your dog’s first-aid kit ready to go. You will need the following supplies to tackle your dog’s broken nail:
- Muzzle
- Styptic powder or cornstarch
- Saline solution
- Dog-safe antiseptic, e.g. chlorhexidine 0.05%
- Gauze
- Nail clippers
- Self-adhering bandage
- Scissors
First-Aid for Torn Nail: The 8 Steps to Follow
1. Muzzle Your Dog

We recommend muzzling your dog before tending to a torn nail. Even the sweetest dog can snap when in pain! Attach the muzzle so you can put two fingers between the head and the muzzle to ensure it’s not too tight.
You don’t want it too loose, either, so make sure the muzzle appears secure and won’t slip before proceeding.
2. Have a Helper Hold Your Dog
Your dog will try to resist when you inspect its nails. Especially if you have a large dog, they can put up quite a fight, so have a capable person hold your dog while you tend to their nails. Have the helper give your dog plenty of reassurance and praise while you work.
3. Stop the Bleeding
As mentioned earlier, nails can bleed quite a lot due to the blood vessels in the quick. If the nail is bleeding, apply some styptic powder or cornstarch to the quick. You can put the powder on a gauze swab and apply it to the nail if it’s easier.
You can also apply a little gentle pressure through the swab to help the bleeding but try not to hurt your dog. If the bleeding doesn’t stop within 5–10 minutes, you should call your vet.
If you need to speak with a vet but can’t get to one, head over to PangoVet. It’s an online service where you can talk to a vet online and get the personalized advice you need for your pet — all at an affordable price!

4. Examine the Nail
Have a look at the torn nail. Look for redness, swelling, or a thick yellow discharge, which would indicate infection. If you are concerned about infection, you need to make a vet appointment; your dog will need antibiotics to quickly deal with the infection and prevent it from spreading to the bone.
Check if the nail is still there and, if it is, what sort of damage there is. Sometimes, the nail is hanging on by a thread or completely torn off. With other nail injuries, the nail is loose but still fairly attached. In other cases, there may just be a crack or split toward the end of the nail.
5. Trim What You Can
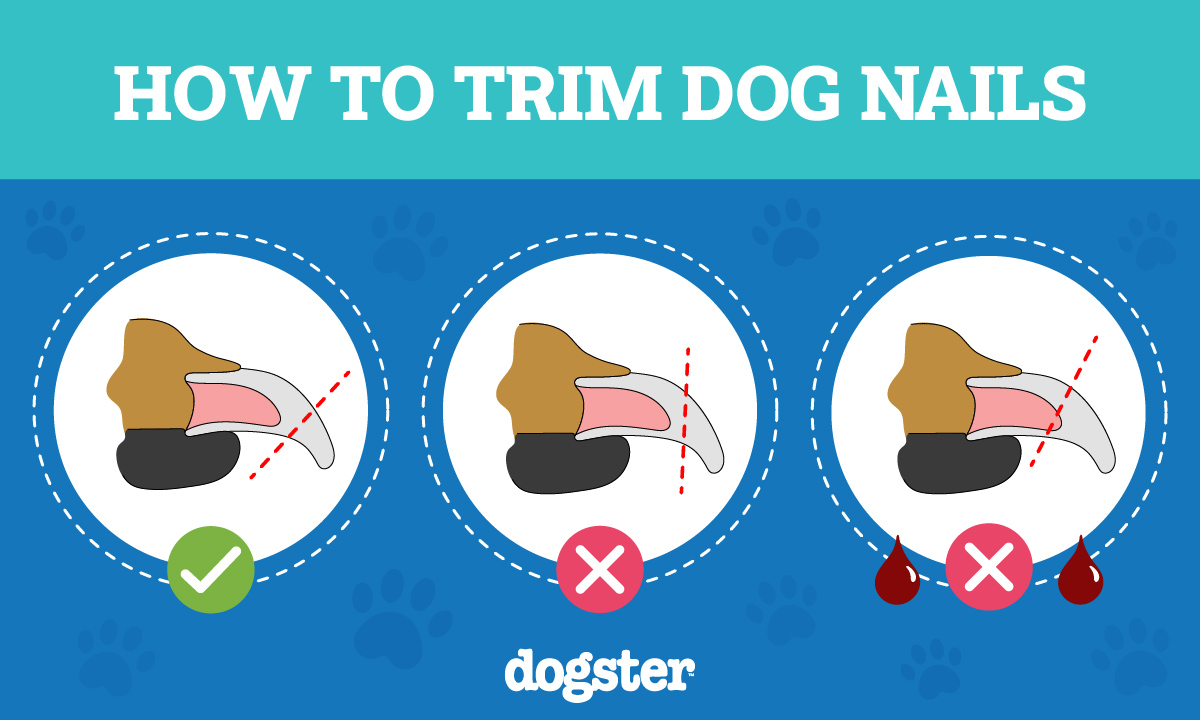
Your dog will be more comfortable without a hanging or a split nail. If the nail is hanging on by a thread, pull it off with one hard, fast pull or cut the tiny thread as close to the nail as possible. If the nail is completely removed, you don’t need to do anything to trim it; over time, the nail will grow back, starting from the base.
If the split in the nail is below the quick, you can trim the nail back to remove the split and make your dog more comfortable. Most of the time, the trimming step is best left to the vet. Partially attached nails are painful to remove and should not be attempted at home.
6. Clean and Wrap the Foot
We want to prevent the nail bed from getting infected. If your dog is particularly fluffy, you may need to trim some of their hair with scissors to stop it from getting into the wound. You should flush the area with saline and follow up with a dog-safe antiseptic.
Then, dry off the foot with clean swabs. Pad the food with gauze and use the self-adhering bandage to wrap it. This will prevent dirt and debris from getting into the injury. However, an improper bandage use can be worse than no bandage at all.
When you wrap the foot, it shouldn’t be so tight that it cuts off the blood supply. You should be able to get two fingers between the bandage and your dog’s foot. If you’re unsure about tightness, it’s better to be on the too-loose side; if it falls off, you can just replace it.
While the bandage is on, it must be kept clean and dry. Put a plastic bag over the bandage if you take your dog anywhere outside with the bandage on. If the bandage gets wet, remove it immediately. Replace the bandage daily to check the nail for signs of infection. For a nail injury, the foot normally stays bandaged for about 3 days.
7. Visit the Vet
If your dog has a torn nail, you might need to visit the vet for many reasons.
- If a semi-attached nail or nail fragments remain: Vets can give your dog sedatives and pain relief, allowing them to remove complex breaks without distressing your dog.
- Your dog is in pain: Sometimes, pain relief is needed for a few days after a nail injury.
- There are signs of infection in the paw: If there are signs of an infection, your dog will need antibiotics. Even once the bandage is removed and your dog seems fine, you must check for signs of infection regularly.
- Your dog won’t stop licking their foot: This can cause an infection, and your dog may need to be fitted with an E-collar and possibly given antibiotics. Constant licking can also be a sign of pain, so it’s best to have the nail checked.
- You cannot examine and clean your dog’s torn nail thoroughly.
8. Organize a Nail Trim
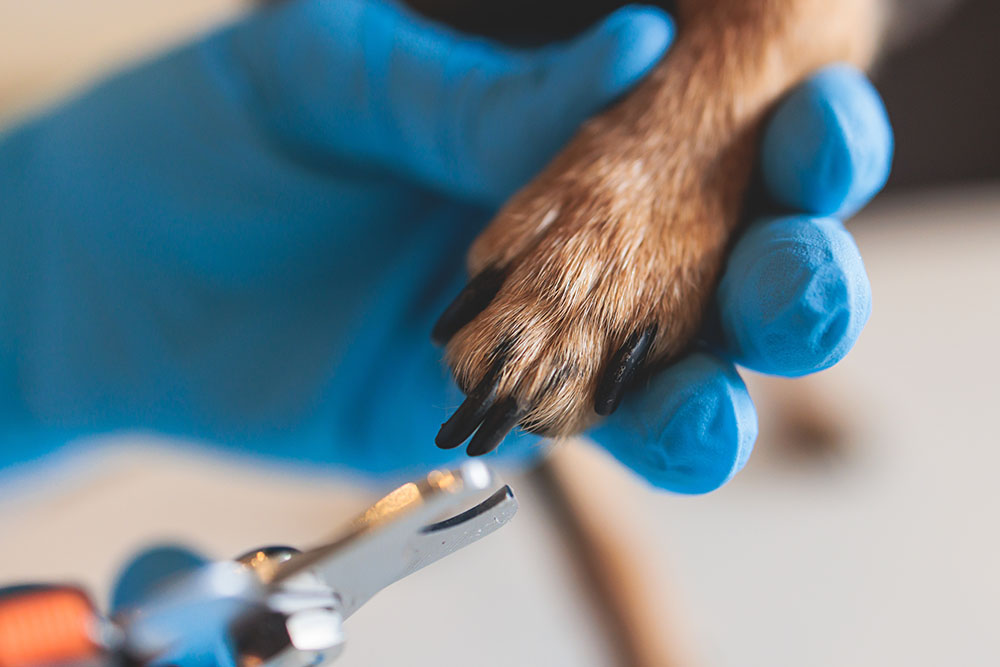
Once your dog has recovered from their ordeal, you should organize a nail trim if needed. Many nail injuries are preventable by keeping the nails at a short length. You can trim your dog’s nails every month, but some dogs won’t need this because they wear their nails naturally on the ground.
Some dogs have long quicks and should have more frequent trimming or nail filing to make the quicks recede.
Conclusion
By following the steps in this article, you can make your dog more comfortable, even if you need to visit the vet anyway. A torn nail is tender and needs treatment. Left untreated, your dog’s constant licking of the nail can have some unfortunate consequences, including a bone infection.
Featured Image Credit: sophiecat, Shutterstock


